Monday, March 24, 2025

The Willow Nymph – Hatch-Matching Stonefly Imitation

Some flies are born from the bench…
This one was born in the water.

Willow Nymph fly pattern designed by Johnny Utah, tied to imitate small dark stonefly nymphs found in trout streams


The Willow Nymph is a pattern I developed after doing what more of us should do — getting hands-on with the river. I spent time sampling streambeds, flipping rocks, and even checking trout stomach contents to see what they were actually eating. One bug kept showing up again and again — a small dark stonefly nymph.

So I tied a fly to match it.
Simple as that.

And that’s how the Willow Nymph was born.


๐ŸŒŠ A Quick Word on Stoneflies

Stoneflies are a key part of the trout menu in many streams — especially clean, oxygen-rich waters. These insects live a long time in the nymph stage, crawling around on rocks and debris before emerging. While not as flashy as mayflies or caddis, they’re a reliable, year-round food source that trout don’t ignore.

They have a distinct shape:
๐Ÿ”น Slim, segmented bodies
๐Ÿ”น Two tails
๐Ÿ”น Long antennae and legs
๐Ÿ”น Often dark brown to black in color

Side profile of the Willow Nymph trout fly showing segmentation, legs, and realistic stonefly proportions Side profile of the Willow Nymph trout fly showing segmentation, legs, and realistic stonefly proportions

The Willow Nymph was designed to match that general silhouette, with just enough realism to fool picky fish, but enough durability and movement to hold up, fish after fish.


๐Ÿชถ Materials & Design

  • Dark brown dubbing body for a natural stonefly tone

  • Thin profile to match the naturals I found streamside

  • Soft legs and antennae for subtle movement

  • Simple wingcase to complete the look

No flash, no gimmicks — just a solid hatch-matching fly that’s earned its place in my box by producing.


๐Ÿงช Field-Tested

This isn’t theory. The Willow Nymph has been fished hard — and it’s brought trout to the net when other patterns didn’t. I’ve used it during early spring, during midday lulls, and especially in pocket water where stoneflies love to cling. From big rivers to small streams, the willow produces tight lines.

Brown trout caught using the Willow Nymph, shown in hand near stream as proof of the pattern’s effectiveness


Watch the Video:

Willow Nymph – Hatch-Matching Stonefly Pattern
๐Ÿ“บ https://youtu.be/7WiNONTXUFE?si=vYVWAahc9az_tzx7

Tied from the stream. Tested on the fish.
The Willow lives.
– Johnny Utah

The Royal Flymph – Attractor Fly with a Royal Bloodline

Some flies match the hatch.
Some flies make the hatch irrelevant.

Royal Flymph soft hackle fly pattern tied with peacock herl, red band, and hen hackle


The Royal Flymph sits firmly in the second camp — a soft hackle variation born from the legendary Royal family of flies, but with just enough grit and attitude to stand on its own.

Let’s talk lineage for a second.

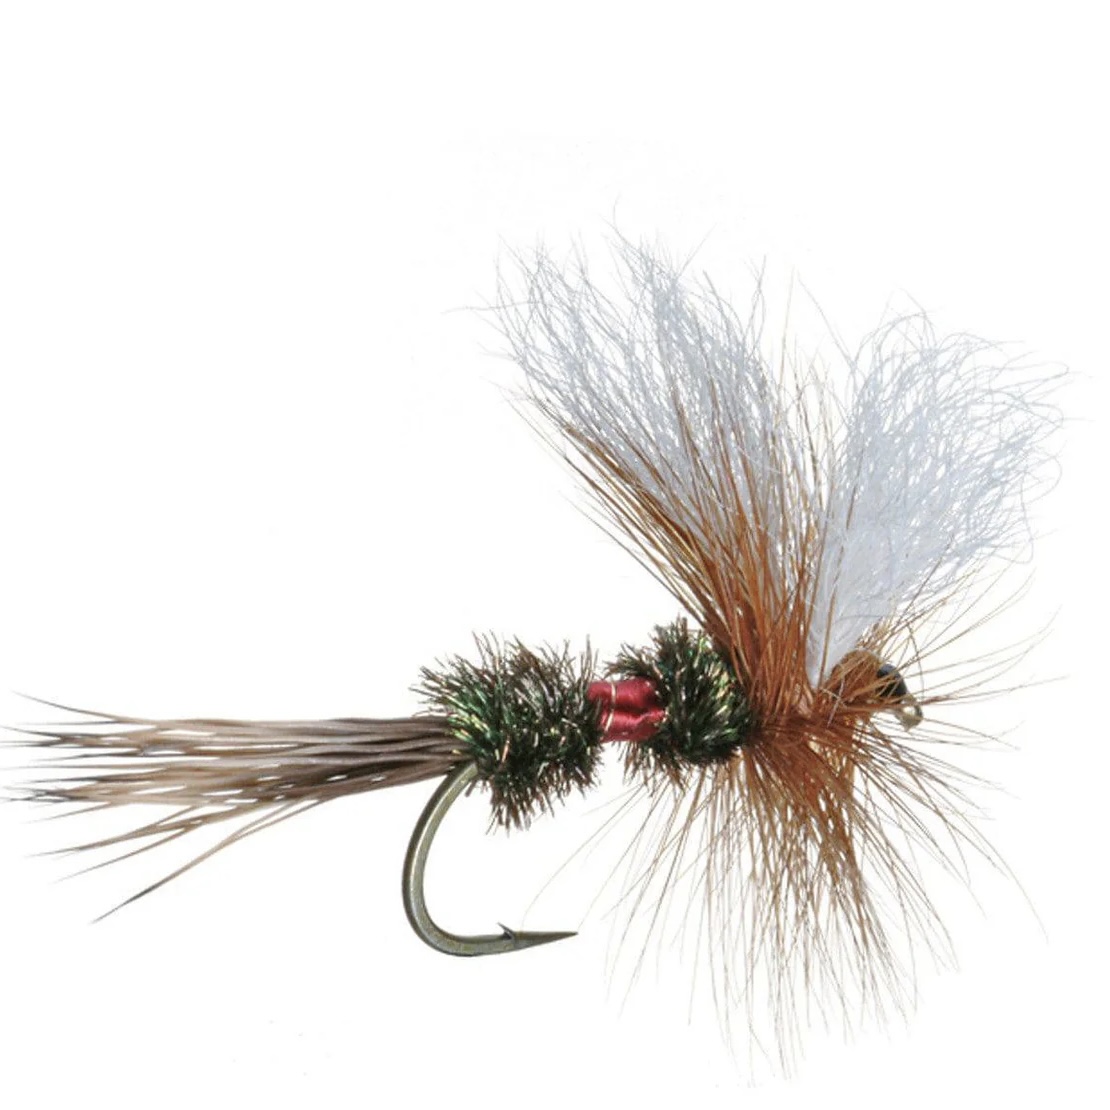
Classic Royal Coachman trout fly with white wings, peacock body, and red floss band, barred wood duck tail

The Royal Coachman is a classic — dating back to the mid-1800s. It was one of the first flies to really embrace flash in a trout fly, mixing bright red floss and peacock herl with white wings. Later, Lee Wulff took that formula and adapted it into the famous Royal Wulff — a bushier dry fly with elk hair wings that could ride high in rough water and get noticed in a crowd.

Royal Wulff dry fly pattern tied with elk hair wings and bushy body for rough water fishing


So where does the Royal Flymph come in?

Let’s call it the twice-removed cousin of the family.
You won’t see it in the family portraits… but it shows up unannounced, drinks all the beer, and walks off with a cooler full of trout.

This pattern was something I came up with on my own — I hadn’t seen it tied before. I just wanted a soft hackle attractor that carried that same red-and-peacock punch… but with movement, bugginess, and that subtle life in the water that only soft hackles deliver.

๐ŸŸฃ Peacock herl body
๐Ÿ”ด Red floss band
๐Ÿชถ Soft hen hackle collar

Fish it like a wet. Swing it. Drift it. Let it rise. It gets attention — and it gets eaten.

This isn’t a hatch matcher. It’s an attention grabber. A fly for stained water, high sun, or trout that just want something bold.

And best of all? It ties fast, fishes hard, and bridges the gap between the old school and the new school.


๐Ÿ”— Watch the Video:

Royal Flymph – A Classic Fly Reimagined (Still Deadly)
๐Ÿ“บ https://youtu.be/Ama_fdHLpp0

Long live the Royal Flymph.
Flashy. Soft. Deadly.
– Johnny Utah

๐Ÿ’ฌ Got a Take?

Ever tied your own version of a Royal pattern?
What’s your twist — or do you keep it classic?
Drop your royal riffs in the comments — let’s talk fly family trees.

Sunday, March 23, 2025

The Wiggle Nymph – My Go-To Before the Hendo Hatch Pops

We all love dry fly action — watching trout sip Hendricksons off the surface is the dream.
But if you’re only fishing dries, you’re missing out on half the hatch.

Before the bugs hit the surface, the real party’s underwater — and that’s where the Wiggle Nymph earns its keep.

Wiggle Nymph fly pattern tied for Hendrickson hatch with soft tail and natural dubbing


This fly has just the right silhouette and subtle motion to mimic emerging Hendrickson nymphs — especially right before they rise to the top.
That “wiggle” gives it lifelike movement that static patterns can’t match.
And let’s be honest… the name says it all. It wiggles. And trout eat it.


๐Ÿง  A Quick Bit of Entomology:

Real Hendrickson mayfly close-up showing wing shape and body color for fly tying reference


The Hendrickson, or Ephemerella subvaria, is a classic early-season mayfly. It hatches in the spring when the water temps creep up around 50°F, and it brings out some of the best dry fly fishing of the year.

But before the duns start popping, the nymphs become active, moving toward the surface and drifting with the current.

That’s the moment you want to be nymphing.
Not deep, not bottom-bounced — just in the zone where those naturals are coming alive.


๐ŸŽฃ Why I Fish This Wiggle Nymph:

Early season trout nymph fly with lifelike motion


  • The colors I tie it in (muted olive, dusty brown, with a little shimmer) match up beautifully with Hendrickson nymphs

  • The soft, wiggly tail and body give it life — even in slow water

  • It’s a great fly to fish an hour or two before the hatch or during lulls when fish aren’t keyed on top

This one stays in my box all spring — and it’s done damage when others were waiting for risers.

Real Hendrickson mayfly close-up showing wing shape and body color for fly tying reference


๐Ÿ”— Watch the Video:

Wiggle Nymph – Deadly Before the Hatch (YouTube)


Tup’s Flymph – A Soft Hackle Inspired by the Indispensable


Trout stream during Hendrickson hatch, ideal for soft hackle fishing

Tup’s Indispensable is one of the most iconic fly patterns ever created — first tied in the late 1800s, with a body made from specially dyed wool and a name that still shows up in fly boxes today.


Tup’s Flymph pattern tied with pink rabbit and UV dubbing


This version — which I call the Tup’s Flymph — is my modern remix on that legendary pattern. It keeps the soft movement, the pale tones, and the trout-magnet profile, but swaps in a custom dubbing blend and a wet-fly build that works great for Hendrickson and Sulphur hatches


Instead of wool, I’ve blended:   

  • White and pink rabbit

  • Hare’s mask

  • A touch of pink UV ice dub

The result is a glowing, buggy body that pulses underwater. It’s got that flymph energy — part soft hackle, part emerger — and it’s pulled more than a few trout for me, especially during tough Hendrickson days when fish are feeding just under the surface.

And it’s versatile.
Want to fish it during the Sulphur hatch?
Just drop the pink and go heavier on the yellow, maybe a dash of orange, and you’ve got a killer variation with the same core profile.

This is one of those flies that blends old-school roots with modern materials — and it proves that a good silhouette, a little movement, and the right color can still do the trick.


๐Ÿ”— Watch the Video:

Tup’s Flymph – Vault Rework on YouTube

Tight lines and timeless flies — the Indispensable lives on.
– Johnny Utah

The Rusty Spinner: Tied tiny, Big Payoff

Simple rusty spinner fly for picky trout

When it comes to spinner falls, trout can get real picky. We’ve all been there — the surface is littered with spinners, trout are rising with clockwork precision… and you can’t buy a take.

That’s when this fly shines.

Rusty spinner fly pattern for trico and BWO hatches
The Rusty Hackle Wing Spinner is one of those patterns that seems too simple to be effective — just thread and hackle, tied sparse and trimmed tight. But under the right conditions, this little fly becomes the golden ticket to trout glory.

What makes it so effective? It’s all about subtlety. This pattern imitates those spent-wing spinners drifting helplessly in the film. The rusty color works wonders during spinner falls — especially when fish key in on BWOs returning as spinners the morning after an evening hatch.

Here’s the kicker:
While most anglers are laser-focused on tricos, they miss the tiny rusty trout treats floating right past them — spinners from yesterday’s BWO hatch, now size 22 and forgotten.
Those spinners are just as small as tricos, and this pattern lets you quietly match that hatch while everyone else is guessing.

And that’s where the real lesson for new tiers comes in —
Tying small takes practice. Learning to manage thread, hackle, and proportions on a size 20 or 22 hook is a skill that pays off across every fly you tie. This pattern, as I show in Beginner Fly Lesson #8, is a perfect place to start.

It’s fast to tie, sneaky-effective, and a fantastic way to build your confidence with small patterns.

If you fish spinner falls — especially on technical water — tie up a few Rusty Hackle Wing Spinners. You’ll be glad you did.

Johnny Utah, Fly fishing, spinner fall, rusty spinner

"dry fly"  "spinner fall"  "trout"  "hatch"  "pattern"


๐Ÿ”— Watch the Video:

Beginner Fly Lesson #8 – Rusty Hackle Wing “Tight lines and rusty threads — see you on the water.”

Saturday, March 22, 2025

Dubbing loop egg.

 Beginner Fly Lesson #6 – Dubbing Loop Egg (It’s Just Yarn… And It Works)

Simple. Effective. Just yarn… again.


Welcome back to another Beginner Fly Lesson! In this one, we’re tying a super-effective pattern that’s perfect for learning a foundational skill: the dubbing loop. The fly? A soft, deadly Dubbing Loop Egg.


Why This Fly Rocks

This pattern is all about minimal materials with maximum impact.
It’s just yarn—again! But the way it’s tied gives it a soft, lifelike profile that drives trout wild.

The real star here is the dubbing loop technique—and this is your gateway to using some of the most fun tools in fly tying: dubbing hooksspinners, and dubbing brushes.


Tools That Make It Fun

You don’t need fancy gear to get started. I use a piece of speaker wire bent into a dubbing hook—and it works like a charm.
But if you want to explore, there are all kinds of dubbing tools out there:

  • Dubbing Hooks: Homemade or store-bought, they help spin your loop tight

  • Dubbing Spinners: From wire handles to rotary versions, they give you more control

  • Dubbing Brushes: Perfect for picking out fibers and adding that buggy, translucent look

Whether you’re rolling with high-end tools or kitchen drawer ingenuity, learning the dubbing loop opens up a whole new world of patterns.


Materials

  • Hook: Standard egg or curved nymph hook (e.g., size 12–16)

  • Thread: Color to match your yarn (orange, pink, chartreuse, etc.)

  • Body: Egg yarn or similar material, spun in a dubbing loop

  • Finish: Whip finish + optional head cement or UV resin


How to Tie It

In the video, I walk through the whole process: forming the loop, inserting yarn fibers, spinning tight, and wrapping it forward to form a juicy egg.
It’s a killer pattern to learn the technique—and to fill your fly box fast.

Watch the video here:
Beginner Fly Lesson #6 – Dubbing Loop Egg (It’s Just Yarn… And It Works)


Pro Tips

  • Don’t overfill the loop—less is more

  • Try brushing out the finished body to get that nice soft halo

  • Play with colors: natural, bright, or mix two yarns in the same loop


Ready to loop it up? Try this one out and tag me if it lands you a trout!

๐Ÿ’ฅ ๐Ÿ’ฅ “Swing down, sweet chariot, stop and let me ride!” ๐Ÿ˜Ž You know we’re on the Mothership Connection now—funky flies, trout candy, and galaxy-brained patterns only. Whether we’re tying a streamer that slaps harder than Bootsy’s bass or dropping a cripple fly that floats smoother than a Parliament groove—we’re locked in, fellow tiers!.

Thursday, March 12, 2020

Leisenring’s black gnat tying tutorial.


Being that I love wet flies, soft hackles, flymphs, and spiders, I thought why not have a tutorial on tying the black gnat.  The recipe I followed is the one the famous James Leisenring wrote and tied.  With the addition of a thread rib for extra protection. This fly is proven effective time and time again. The fly shows what the famous north country spiders of the u.k. show.  Simplicity for imitation is best.
MATERIALS 
HOOK: Wet fly hook 14-20
THREAD: Claret 
BODY- 2-3 black turkey tail fibers from the top of the tail
HACKLE: purple iridescent starling
RIB: tag end of tying thread. 
 Start the thread and advance down to the point.
Be sure to wax the thread and don’t remove the thread tag. 
This will be the rib. 
This is the section of tail used for the body. 

Tie in the turkey tail by the tip at the back of the fly. 
Bring the thread forward. Leave a hook eye space. 

Wrap the turkey towards you on the way up.
Catch it in, tie it down and cut the excess. 

Wrap the the tag rib the same way you wrap
the thread. 

Select a starling feather. (Purple is green! Depending on the angle)

Strip away the fluff. 
Leave a bit at the base for a handle. 

Hold the very tip and pull back the fibers

Tie in the tip of hackle on your side with the front of the hackle facing you. 

Wrap the hackle. Touching turns. 

Tuck the stem back and wind back over it. Cut or break it away. 

Whip finish, varnish and the fly is complete.

Tuesday, March 3, 2020

Tying a cow dung wetfly

The cow dung pattern comes from a time long ago. When people fished for food and survival not for sport.  That alone should tell you how affective it can be.  This one can be extra fun to tie because you get to whip up your own dubbin blend. The colors called for are orange, yellow, olive,and tan.  I mixed all those colors and through some tan U.V. Ice dub.  So let’s tie one up for that trout of a life time!
    Materials. 
 Hook: Your favorite wetfly hook 10-16
Tag: Flat gold tinsel
Thread: Orange
Dubbing: Cow dung blend(orange,yellow,olive,tan)
Wings: Cinnamon hen saddle tips
Hackle: Brown hen neck hackle. 

Start your tying thread 1 hook eye back from the hook eye
Wind back to the point of the hook. 
         
Tie in the flat gold tinsel. Tie it back to the bend.
Then advance the tread, touching turns, back to the point. 
Wind the tinsel back to to the point. 
Touching turns and tie it off to secure the tag. 

This substance is called cobblers wax. 
I know veniards sells it. But you can make it yourself as well. 
Just take some bees wax and resin and mix it together. 
This is the wax I use to make sparse dubbed bodies and dubbing loops! 
Wax the thread and then just use dubbin very sparsely. 
Just touch the dubbin to the thread and what sticks is good. 
Make a dubbing loop by placing your finger on the tying thread,
And bring the thread over the hook shank to form the loop. 


Now you can spin the thread to make a dubbing brush. 
You can do this with certain bobbin holders like Marc petijean bobbin. 
Or you can use the numerous spinners that are out there. 
Leave a comment with your favorite! 
Now it’s time to wind your dubbing loop forward.  If you use a dubbing tool. 
You will need to advance the thread back to where we started the thread.
Then wind your dubbing brush up touching turns and tie off once you’ve made to the front. 


Prepare your hen saddle tips. Cut off the fluffy part.
Place the good side of the feather away from on another in your fingers. 
Then while pinching the tips, pull back the fibers to get the size of your wing. 
I like a wing the same length as the hook shank for these flies. 
Then hold them on top, points facing the rear of the fly. 
Pinch and loop them on top.  This can be tricky, just take your time. 

Now tie in the hackle. Have the shiny side up. 

Wind the hackle, stroking the fibers back as you wind. 
Depending on how your hackle is will determine the amount turns. 
A good rule of thumb with hen neck, is two-three turns. 

Whip finish and cut the thread. Head cement if you like too.  

And this concludes the tying of the cow dung hackle wing. The original calls for turkey for the wing.
Have a wet fly you wanna see tied here on the fly corner? Just leave a comment!  Feel free to share this info.

Wednesday, February 7, 2018

question?..... sneak peak


Took a break from posting and taking pics of ties and flying. I've been thinking about getting back at it.  I've still been tying and flying, just the camera has not been in the picture.... lol   I need to reboot the blog here, since photo bucket decided to steal my images for some of the post and I know links are down on some topics on the side bar.  Ill have all these problems done soon. 

 So my question to my subscribers is, which flies or techniques would you like to see here? Leave me a comment and let me know! maybe the infamous golden oldie?


Tight ties
Johnny Utah


Thursday, July 9, 2015

Best u.v. Resin on the block.


Deer creeks uv resins are bar none my favorite.  Been using it for a while now and I'm sold big time.  No tack no haze and diamond hard.  
  Nymphed with it on my golden oldie and high test hairs ears along with the diamond scuds and many other nymphs.  The resin didn't crack, scratch or even fog and held on to the patterns after many outings.  
   I highly recommend you pick some up. You can get it with free shipping from www.castersonlineflyshop.com. Be sure tell them Johnny sent ya!  

Tight ties! 
Johnny. 

Wednesday, February 11, 2015

A splinter mouse

Tied it small for smaller trout.  I also tapered the foam to give it a mouse profile for day time fishing on some local streams. I cut the rabbit fur on angle as well to give it more of taper. 

Hook- #4 stinger 
Thread- 6/0 uni black
Tail- zonker strip. 
Body- wound zonker strip
Top- evazote foam black. 

Thursday, July 3, 2014

Small rusty hackle wing spinner video


Materials
Hook- Daiichi 1110 #20
Thread- Uni 8/0
Tail- Light dun rooster hackle
Abdomen- Tying thread
Thorax- Rust or rusty brown dry fly dub
Wing- light dun hackle. 

*** I forgot to mention in the video that I only use neck hackle on these. I find the saddle hackle barbs too large width wise.  Neck hackle is just a lot more supple and that's a great thing for a spinner. 

Monday, June 30, 2014

A great little fly


The hackle wing rusty spinner is a staple in my box.  Tied large to small. Pictured is a size 20. The small sizes with a simple thread body have served me well on many streams.  From the tough limestones to tail waters and everywhere in between. 
 The hackle wing spinner is an old spinner pattern that is hands down one of the most effective and durable ways to tie a spinner.  Quick, easy and few materials make this fly a no brainer.  
  
I'll be instructing how to tie this pattern at our up coming ridge and valley tying night on July 1st at the Musconetcong water shed association blg in asbury nj.   @ 730pm.  Come on out and learn to tie this deadly fly.   Also Utah's fly corners next video in the works is for the #20 rusty hackle wing spinner.  So stay tuned. 

Johnny 


Monday, October 28, 2013

Little black diving caddis tutorial

 Here is a tutorial for the diving the caddis wet fly. I always tie a few small black ones. They work really well on streams with good little black caddis populations.  The fly is effective almost all day long and is best fished down and across with mends to allow the fly to drift naturally or dead, then allow to swim when the mend straightens. 

Friday, October 25, 2013

Ready 2 Pop tying video


Materials
Hook- Daiichi 1180 12-18
Thread- Black Uni 8/0
Tail- Teal flank dyed claret
Abdomen- Teal flank dyed claret
Rib- Kreinik Metallics  Blending Filament 032
Thorax- Marabou butt material form the base of a claret teal flank feather, blended with STS claret 
Wing case- Evazote foam black


Wednesday, October 23, 2013

Diving caddis video

Materials
Hook- Daiichi Alec Jackson North country spider hook
Thread- Uni 8/0 Tan
Body- Polar dub Tan\
Wing- Mallard flank dyed wood duck
Wing topping- Antron yarn white/clear
Hackle- Hebert miner hen neck hackle  Barred dark ginger

Thursday, May 23, 2013

The H.O.H. dun and the sulphur hatch.

   Ok, so I belong to a group on a fly fishing website called the fly of the month group. This months fly was any H.O.H. fly. H.O.H. meaning hackle on hook.

 My friend Tom tied up some duns in a variant style, with the trimmed hackle for bodies.  I thought they looked pretty cool. So I decided to twist up a thorax dun.  I figured why not do a favorite dry fly pattern of mine and seeing how the hackle was getting trimmed for the body the v cut hackle just made sense to me.


 The fly consists of only hackle and thread. So there is nothing on it that can absorb water, thus making it a perfect dry fly. The idea that Tom had behind the hackle cut body was for it to give the translucent effects that the naturals have to them.  Sounds reasonable to me, so I twisted one up in sulphur and headed on out to a local freestoner for the sulphur hatch. 


  So with my trusty 2 wt and H.O.H. I made my way to the stream at the last bit of twilight.  I went a favorite pool of mine. It consist of heavy riffle leading into and long tail out.  I can always find some trout sipping and gulping insects near or in the tail out. 
  On the way to the water I was being buzzed by sulphur duns and spinners flying about.  I just hoped the rain would hold out long enough for me to get a trout or two.


The clouds cleared a bit and the moon came out and bathed the pool in moon light. I could see fishy noses poking up from the water every so often. I made my first cast and landed a bit short of the feeding lane. The next was on point and the trout took the H.O.H.. A good fight later I had the hen landed.
   I hooked several fish and one was very large as i couldnt really move the fish with my 2 wt. haha. The fly popped on that fish and I remembered why I didnt use mustad hooks anymore...... I ran out of daiichi 1100 in 14! and had some mustad laying around.

I'm not a great photographer by any means! but I'm no photographer at all in the dark! But you can still make out the fly. The proofs in the pudding as they say.  I will do a tutorial of this technique very soon.  And my daiichi hooks should be on there way! Thank you J.W trout